How to make a leather paddle: Difference between revisions
(Created page with "{{Header|How to make a leather paddle 11/21}} thumb|200px|The leather paddle. by Spankart, 5 August 2008. This tutorial explains st...") |
No edit summary |
||
| Line 23: | Line 23: | ||
=== Step 1 === | === Step 1 === | ||
<gallery mode="packed" heights=" | <gallery mode="packed" heights="200px" caption=""> | ||
Image:Leather paddle step 1.jpg|The material, the sketch and the cardboard | Image:Leather paddle step 1.jpg|The material, the sketch and the cardboard | ||
Image:Leather paddle step 2.jpg|The paddle sketched on the cardboard. | Image:Leather paddle step 2.jpg|The paddle sketched on the cardboard. | ||
| Line 33: | Line 33: | ||
=== Step 2 === | === Step 2 === | ||
<gallery mode="packed" heights=" | <gallery mode="packed" heights="200px" caption=""> | ||
Image:Leather paddle step 4.jpg|thumb|250px|Cutting the paddle from the leather. | Image:Leather paddle step 4.jpg|thumb|250px|Cutting the paddle from the leather. | ||
Image:Leather paddle step 5.jpg|The two layers. | Image:Leather paddle step 5.jpg|The two layers. | ||
Image:Leather paddle step 6.jpg|Glue applied. | Image:Leather paddle step 6.jpg|Glue applied. | ||
</gallery> | </gallery> | ||
With the [[pencil]], copy the shape to the leather and cut it out with the cutter knife. You may want to cut a millimeter or two bigger so you'll have some extra material to grind away later when finishing the paddle. You will not be able to cut a leather as heavy as this in one go, so take your time, don't apply too much pressure and patiently work your way around again and again until you're through. Make sure to put a cutting board or an old piece of wood or carpet underneath. | With the [[pencil]], copy the shape to the leather and cut it out with the cutter knife. You may want to cut a millimeter or two bigger so you'll have some extra material to grind away later when finishing the paddle. You will not be able to cut a leather as heavy as this in one go, so take your time, don't apply too much pressure and patiently work your way around again and again until you're through. Make sure to put a cutting board or an old piece of wood or carpet underneath. | ||
| Line 44: | Line 43: | ||
=== Step 3 === | === Step 3 === | ||
<gallery mode="packed" heights=" | <gallery mode="packed" heights="200px" caption=""> | ||
Image:Leather paddle step 7.jpg|Pressing. | |||
image:Dubbin_tin.jpg|Dubbin_tin | image:Dubbin_tin.jpg|Dubbin_tin | ||
Image:Leather paddle step 8.jpg|The finished paddle. | Image:Leather paddle step 8.jpg|The finished paddle. | ||
Revision as of 00:53, 13 November 2021

by Spankart, 5 August 2008.
This tutorial explains step by step how to make your own leather paddle.
Concept
The plan is to make a double-layered leather paddle without sewing. We will use the strongest available type of leather such as is used for the soles of shoes. The resulting paddle is 8 mm thick, as heavy as a wooden one and stiff with just a little remaining elasticity, for a good thud.
Material and tools
- a piece of hard, heavy leather, about 4 mm thick
- cardboard, pencil, scissors
- a cutter knife
- cobbler's glue
- something to press
- something to grind/sand the edges
- a bit of dubbin
Let's go!
Step 1
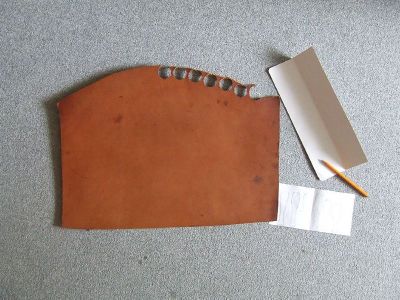
The material, the sketch and the cardboard
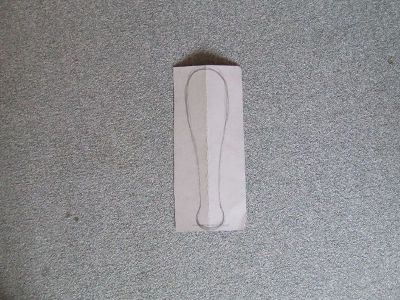
The paddle sketched on the cardboard.
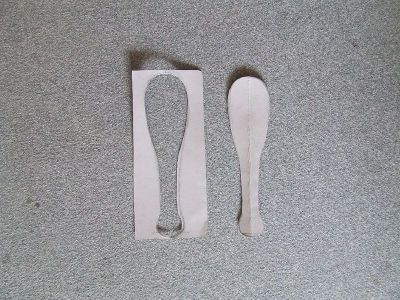
The cardboard stencil. Either the negative or the positive form can be used.


Before you start, it's a good idea to give some thought to the exact shape and size of paddle you want to make. I sketched a couple of designs before I knew what I wanted to go for. I chose a not too big size: 30 cm by 8 cm (12" by 3").
To get the shape exactly symmetric, the cardboard is a simple and effective tool. Fold it in half, unfold it, then draw the shape on it, aligned to the fold. Then fold it again and cut both halves together.
Step 2
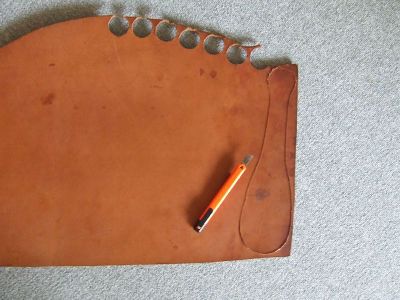
Cutting the paddle from the leather.
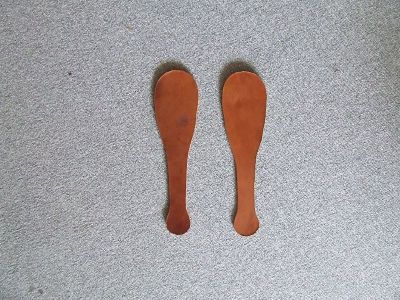
The two layers.
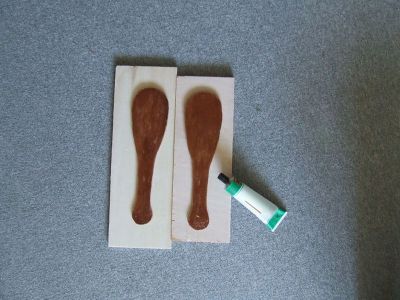
Glue applied.


With the pencil, copy the shape to the leather and cut it out with the cutter knife. You may want to cut a millimeter or two bigger so you'll have some extra material to grind away later when finishing the paddle. You will not be able to cut a leather as heavy as this in one go, so take your time, don't apply too much pressure and patiently work your way around again and again until you're through. Make sure to put a cutting board or an old piece of wood or carpet underneath.
Repeat the process for the second layer. If you've done a good job with the symmetry, the two pieces should fit together. Sand the sides that will be glued together and wipe them clean. The surface must be dry, free from dust, grease and dirt. Apply the cobbler's glue according to the instructions on the glue. In my case, this meant application on both sides, 15 minutes drying time, setting together, pressing firmly, and letting set for a few hours.
Step 3

Pressing.
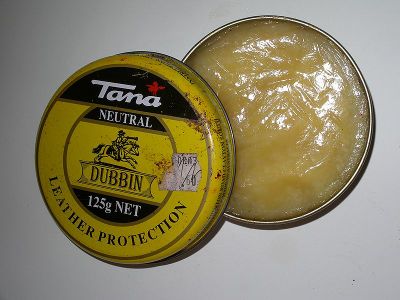
Dubbin_tin
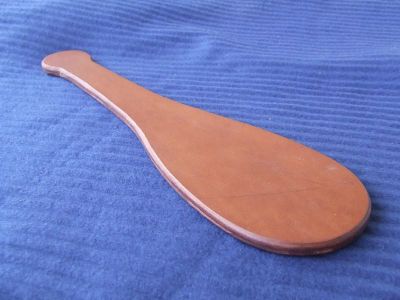
The finished paddle.


Finally grind the paddle so that both sides are exactly level. I used a small grinding machine which was very practical. Bevel or round all edges. Finish off with sandpaper. At last, apply a very little bit of dubbin if you have some (alternatively, grease or petroleum jelly will do) - not too much - and rub it in. This will seal the surface and make it look nice.
Happy spanking!
See Also
Chat rooms • What links here • Copyright info • Contact information • Category:Root