Make your own butt plug

This tutorial (by Spankart, 30 June 2008) explains step by step how to make your own durable butt plug. You won't need complicated machinery or materials in this method, only a bit of time - and the ability to enjoy this kind of work. :)
Material and tools
- Material and tools needed
- soft wax
- gypsum (plaster)
- water
- a small and a big bowl
- an empty water bottle
- a few pins
- a baking oven
- a casserole
- an old kitchen knife
- hot glue sticks (you won't need the glue gun if you have an oven)
- a hairdryer
The idea
The reason why I made my own butt plug at all was a) that I'm a do-it-yourself person and love experimental and creative work, and b) that I just couldn't find the perfect plug for my taste in the shops - they are all either too big, or too small, or not the right shape, or not the right material.
Silicone is a nice, safe and popular material for sex toys and would have been my preferred material, but the kind of silicone that is used by the professional toy producers has a too high melting point, and silicone that has a lower melting point, but not too low either, is difficult to find.
However a related material that has just the right properties, and which is easy to obtain and inexpensive at that, is hot glue (also known as hot melt adhesive, the cylindric sticks you normally put in hot glue guns). It is solid, non-sticky and a little elastic at room and body temperature, and melts when heated to 100°C - 120°C. The great thing about the method described in this tutorial is that you can really determine the exact shape of your sex toy - make it short or long, wide or narrow, double-bulged, ball-on-stick-like or whatever you've always imagined might make a nice toy.
The method
The technique we're going to use is known as lost-wax casting, also known by the French name of cire perdue. First we make a wax model, then we make a plaster mold, then we melt the wax (which destroys the original model), then we make the cast, and finally we break the mold. This method means that you can produce only a single cast, so it's not good for mass production, but it's okay to make your own personal butt plug like an artist makes a sculpture.
Be warned: This method is inexpensive in terms of materials, but takes time and work! It took me about 8 hours of work (net) until my first homemade butt plug was finished.
Let's go!
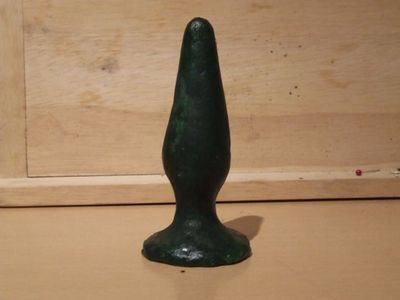
- Step 1 - Making the wax model
The wax should be kneadable in your hands. I used the green wax covering of a piece of cheddar cheese, which had just a nice consistency after working it for some minutes. This is the fun part. Take your time to create the "perfect shape" of your butt plug.
I used the "classic" butt plug shape: easy and painless to go in, flared enough it stays well in place once plugged up, and easy and painless to remove. If at any time your wax model gets too soft from kneading, just put it in the refrigerator for some
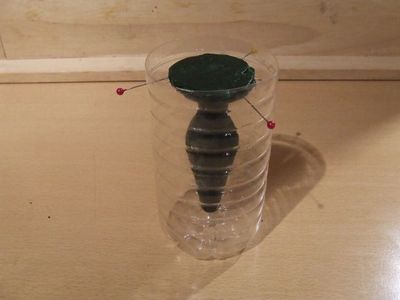
- Step 2 - Making the mold
For the mold, I used an empty plastic water bottle, cut open. It has to be a little bigger than your wax model in all dimensions, but you'll not want it too big, as this only means more unneeded plaster and more work to remove it later.
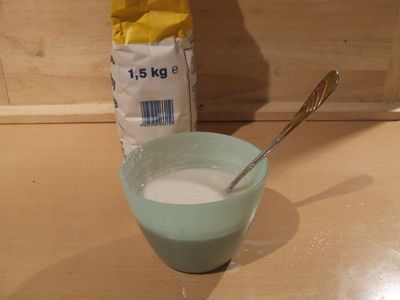
The wax model is put in upside-down and stabilized with the help of pins. A pin at the tip end (now at the bottom) keeps it a few millimeters hovering over the bottom of the plastic bottle. Then you combine gypsum with water to make the plaster for the mold. Use about equal volume parts of gypsum and water. When it has a nice smooth consistency, try to get it as bubble-free as possible and then fill it in the bottle such that the wax model is completely covered from all sides.
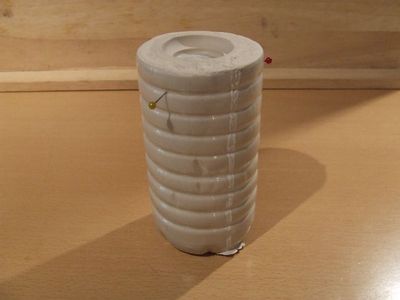
You'll need a sprue at the top end. You can either make it from wax when you make the model, or (as I did because I was out of wax) just put a plastic cap on top to create a wide enough opening in the mold. If your model has a complex shape you will also need vents, but in my case vents were not necessary.
Let the mold harden and dry overnight.
- Step 3 - Melting the wax
Pull out the pins. Cut and peel off the plastic bottle. If necessary use your old kitchen knife to widen the sprue.
Heat your oven to 180°C and put the mold inside, upside down, with a casserole underneath to catch the molten wax. Bake for 1 or 2 hours. Some of the wax will soak into the walls of the mold. This probably can't be helped, but it's okay as long as the cavity we want is free from wax as good as possible.
Let the mold cool off.
- Step 4 - Casting the toy
The next step is easy and fun. Reheat your oven to 120°C. Put the mold in and simply put a glue stick inside the opening and let it melt. Then put the next glue stick in and repeat this until the mold is filled with liquid glue to the top. Try to get all the air out and no bubbles.
Then take the hot mold out and let it cool off again. The glue will shrink a little when it cools off, so be sure to fill it a little higher in the sprue - you can always cut away excess material later.
- Step 5 - Removing the mold
Fill a big bowl with water and let the mold soak. Then try to break the mold apart with your hands. In my case the mold was quite hard (I guess I should have used more water and less gypsum), so I had to use my knife to break it off bit by bit - careful to not cut or break the toy inside.
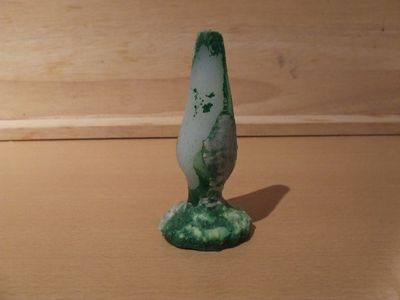
Then came what turned out to be the hardest part: to remove all plaster and all wax from the outside of the butt plug. This was much tougher than I had imagined. It took me 2 hours of labor with the knife, and it was still not as clean as I'd have liked it because i didn't want to cut off too much of the plug's material. I also used brushes and sandpaper, but the knife was most effective.
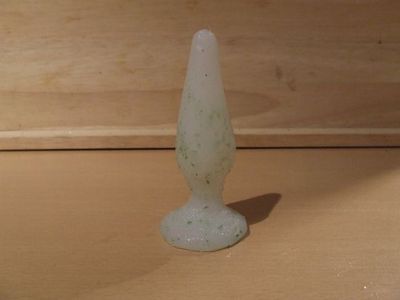
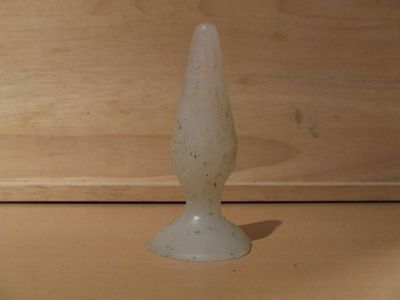
Finally I gave the plug a smooth surface by carefully reheating its outside to just the melting point with a hairdryer so that it became shiny and even. Admittedly it's not as pretty as a butt plug from the shop - it looks hand-made, not perfectly white, not perfectly symmetric. But it is fully functional, and you don't have eyes where you're going to put it, anyway. ;)
- Result
It was definitely worth the work! I tried the plug the same evening and I've never had such a good anal toy. The shape and size I had designed was perfect and it really felt superb.
The same technique will no doubt work well for dildos, enema nozzles, and similar toys. You could probably even make your own vibrator by dipping a vibrator egg into the glue while it's liquid.
Note: See Vibrating butt plug tutorial.
I'd love to see other people's results who try this, or a similar method! So please leave your feedback on the discussion page or contact me privately by e-mail.
Safety warning
Follow these instructions and use your toy 100% at your own risk. If your toy is too thin anywhere, it may break off during use, so you'll want to keep the material's properties in mind when you design the model. And don't leave it anyplace where temperatures can rise to over 50°C - 60°C, or it may deform.
Lessons learned
The next time I will probably use white wax, paraffine wax or maybe a solid type of fat (copha? butter? soap?) instead of the green "cheese wax", which didn't really melt so well. I may also try a release agent, maybe some kind of oil.
Next time I may also make the model a few millimeters bigger in all dimensions so that I can cut away more material when finishing the plug with the knife.
- DIY butt plug


Links
Chat rooms • What links here • Copyright info • Contact information • Category:Root